
A novice WordPress user always came across this question “How to install and set up a Yoast SEO plugin correctly in WordPress?” Most beginners are unaware of the term SEO. It’s always challenging for them to determine which SEO plugin they should install and activate.
Yoast SEO is one of the finest and most popular WordPress SEO plugins in the market. It provides the broadest range of tools that you can use to optimize your website.
Going through this article you will learn the complete process of Yoast SEO plugin set up in WordPress. This will help you to enhance the SEO of your website.
Features
Yoast SEO plugin has several in-built resources and features which makes it the most extensive WordPress SEO plugin. Let’s take a quick glance at some of its attributes.
- Adjust the title of SEO post and the meta definition per article.
- It analyzes Title and meta description for taxonomies (e.g. category and tags).
- You can preview the snippets to see how it will appear on Google search results.
- An optional box for Focus keyword analyzing.
- Meta Robots settings:
- Simple add noodp, noydir meta tags.
- Effortlessly no follow and no index pages, taxonomies, or entire archives.
- Enhanced canonical support, canonical addition to taxonomy archives, single posts and the front page.
- Configuration for RSS footer/header.
- Support Breadcrumbs along with customizable breadcrumbs titles.
- XML Sitemaps with different features.
- .htaccess and robots.txt editor
- Webmaster tool for Google Search Console, Yahoo Site Explorer, and Bing verification.
- Facility to import and export SEO data from previous SEO plugin or SEO integrated theme.
How to Install Yoast SEO Plugin
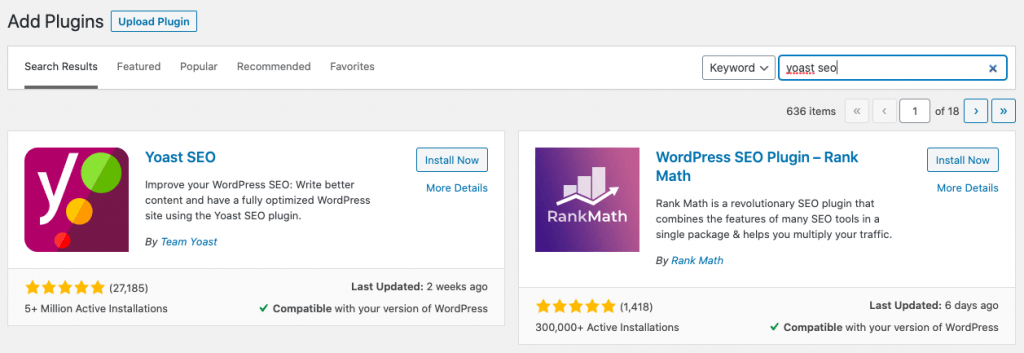
First of all, go to the plugin in your WordPress dashboard then click on add new. Moving on in the search box just type Yoast SEO and pick the right one to click on install then press activate.
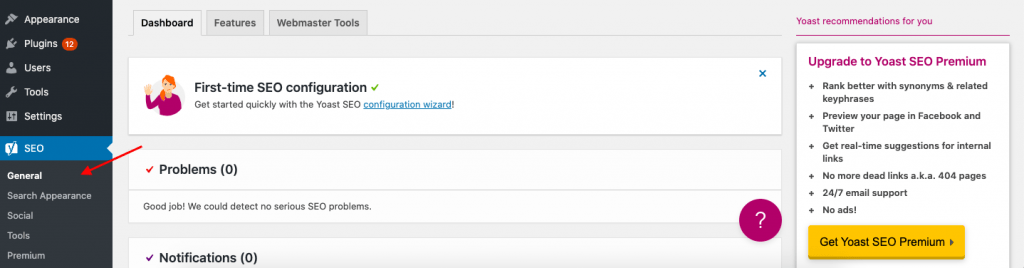
After activating your plugin you will be able to see a new option of SEO with Yoast SEO logo in the WordPress Dashboard admin bar.
So we are done with the initial process of installing and activating the plugin. Now it’s very important to set up this useful plugin correctly.
How to Setup WordPress SEO Plugin by Yoast
Here we are recommending you the settings that we prefer. It might vary from the other experts depending on their preferences so you can skip a few of them as per your wish.
For a beginner who needs guidance to use Yoast’s WordPress SEO plugin as per our level of expertise, focus on each step and follow carefully
Step 1 – Data Transfer
You might be using some different WordPress plugin such as All in One SEO Pack, or maybe a theme framework Genesis handling your SEO statistics and information.
Before deactivating your current/previous plugin you must ensure that your existing data has been successfully transferred to Yoast SEO plugin.
To execute this data transfer easily we suggest using a plugin SEO Data Transporter by StudioPress. For new blogs, this step can be skipped.
Step 2 – General Settings
Click on the SEO icon in your WordPress dashboard then select the General Setting tab. You will see a clickable link to open configuration wizard. You need to cross this configuration option as we are following step by step approach and will discuss it later.
Step 3 – Yoast SEO Features
As we mentioned earlier Yoast SEO has several features. So this section gives you a choice to turn on or off those features. You will find all features in this section turned on by default.
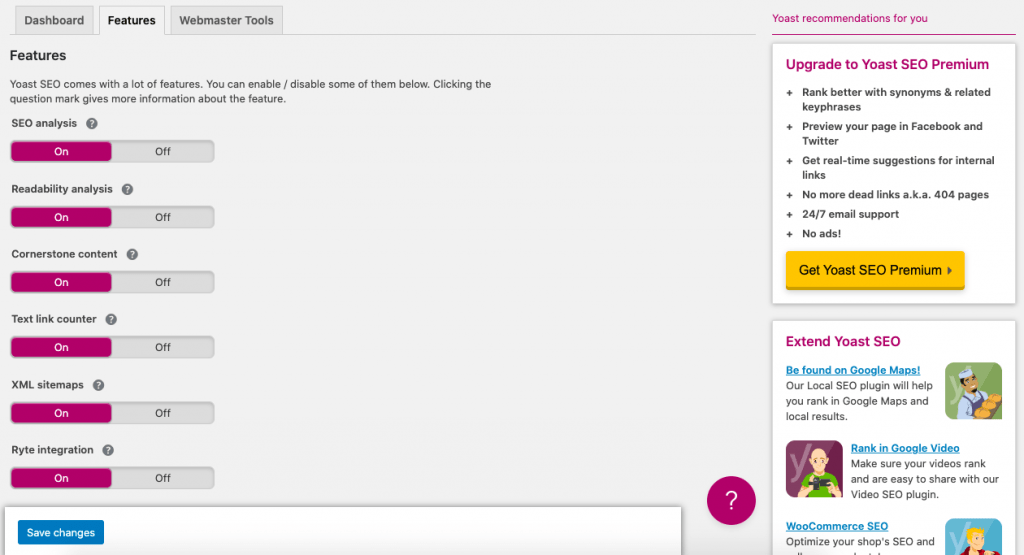
As we progress in this article we will discuss few of them. At the moment let’s have a brief look at each term and their functionality.
- SEO analysis: It analyzes your content and displays SEO score with suggestions to improve.
- Readability analysis: This feature analyzes the content clarity and conciseness then gives you a readability score.
- Cornerstone content: Your most valuable content or page is known as cornerstone content and this feature let you recognize and sort such content.
- Text link counter: Gives information about the number of internal and outbound text links
- XML sitemaps: Helps in creating the XML sitemaps of your website.
- Ryte integration: Ryte test your website on a weekly basis and send a notification to Yoast SEO when the site is deindexed.
- Admin bar menu: In the WordPress admin dashboard it displays the Yoast SEO menu.
- Security: no advanced settings for authors: For enhancing the security this feature does not show advanced SEO settings to authors.
- REST API: Head endpoint: This will provide you all the metadata for a particular URL as per requirement.
Step 4 – Webmaster Tools
Many well-known search engines let the website’s owners to submit their site with the help of webmaster tools.
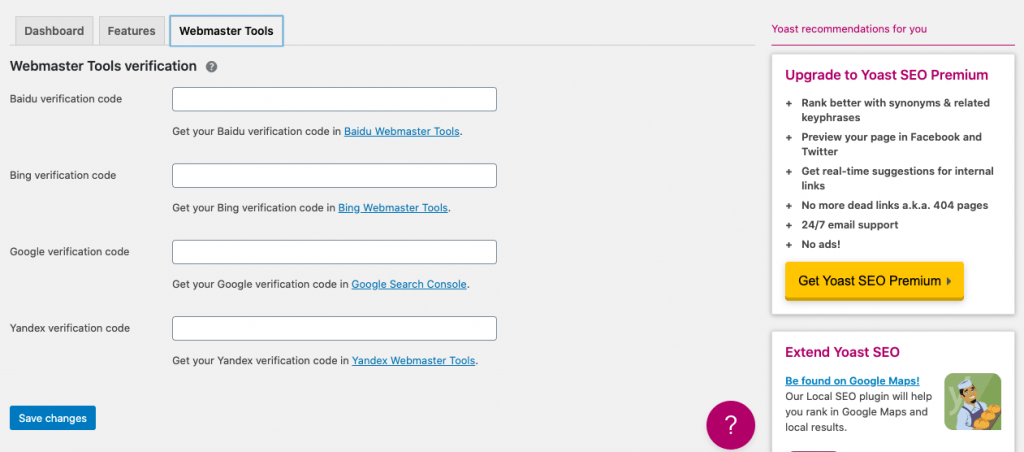
You can check your website with all popular search engines with Yoast SEO. For this, you can simply sign up to different search engine’s webmaster tool system.
Then the ownership of your website will be verified. For verification, you will get a meta code from the search engine and that meta code should be submitted in the appropriate fields.
Step 5 – Search Appearance
In Yoast SEO settings, Search Appearance manages how your website looks in the search engine results page. It provides a variety of options for your blog, files, single article, and taxonomy.
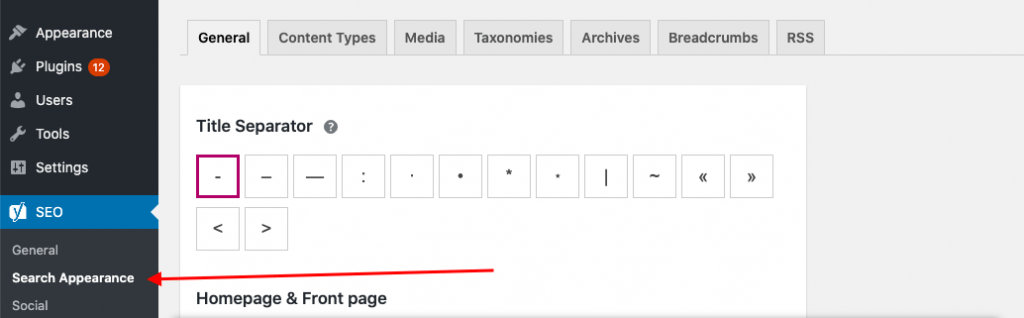
Now let’s have a look at every option one by one starting with general settings.
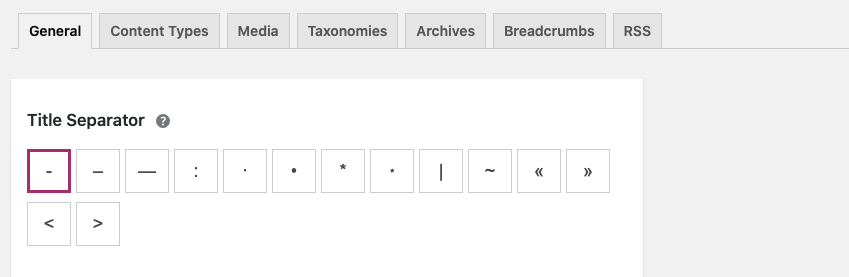
General
In this section, you can set a symbol from the available options which will act as a separator between titles. You can go with a dash symbol if you do not want to change the default option.
Your website’s landing page/homepage SEO title and meta description can be selected in this section.
Then you will see the knowledge graph and schema option for your website. And you can select if your website is organizational or run by an individual.
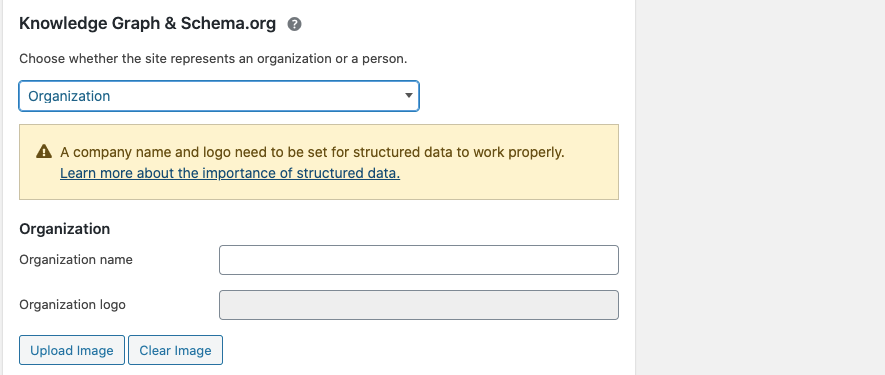
Here you can set your profile picture or logo depending on whether you are an individual or business entity.
Content Types
The SEO title and description of every post or page can optimize individually. In Yoast SEO you can also fix an automatic template which can be used for page and post.
If you miss to insert them manually, Yoast SEO will use the automatic feature to fill those fields using default settings.
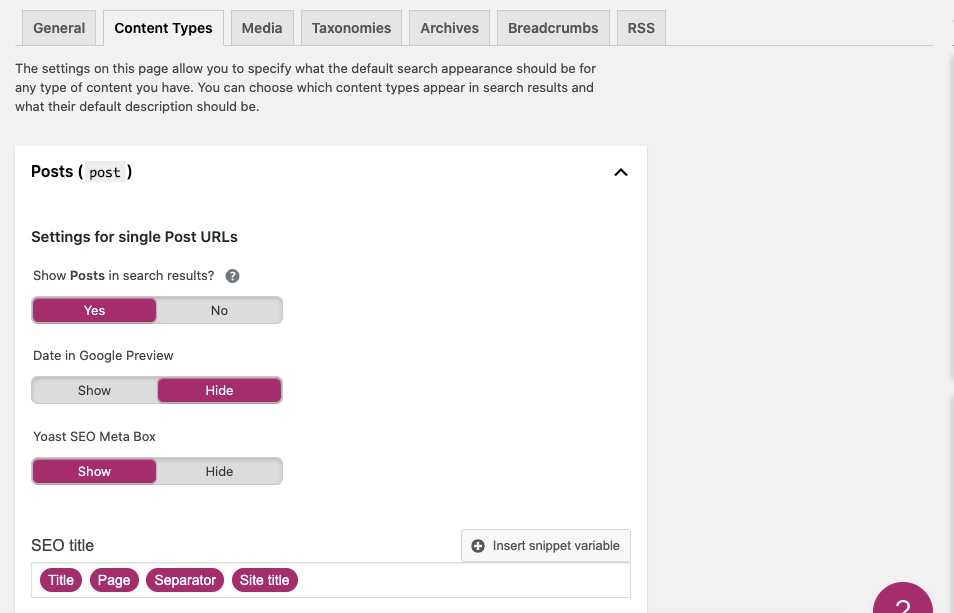
Many options like date snippet, search appearance, SEO meta box visibility for each content can be set by you. For every website, the default choice will work.
Then you are allowed to set SEO title template and a predefined meta description.
Though we suggest you to only modify your SEO title and skip the meta description box empty. Doing this would permit Yoast SEO to dynamically create a description from the initial lines of your blog post.
Media
Whenever you add images or media in your article or pages, WordPress generates a separate page for every media. All your attachments will appear on this page.
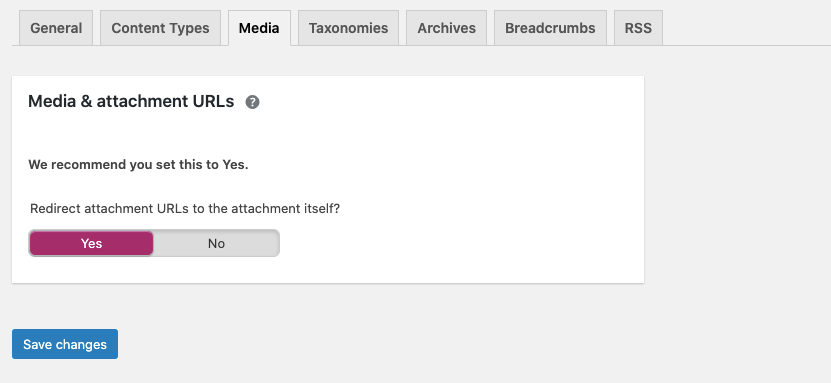
There is no important text on such attachment pages and they have no purpose for search engines. Rather these pages have a negative effect on SEO as search engines perceived them to be of poor quality content.
Yoast SEO lets you resolve this issue by redirecting users to the attachment file rather than the attachment page. You should not toggle the button and let it be on default value ‘Yes’.
Taxonomies
This tab allows you to customize titles and meta for categories, tags, archives post-format, and custom taxonomies.
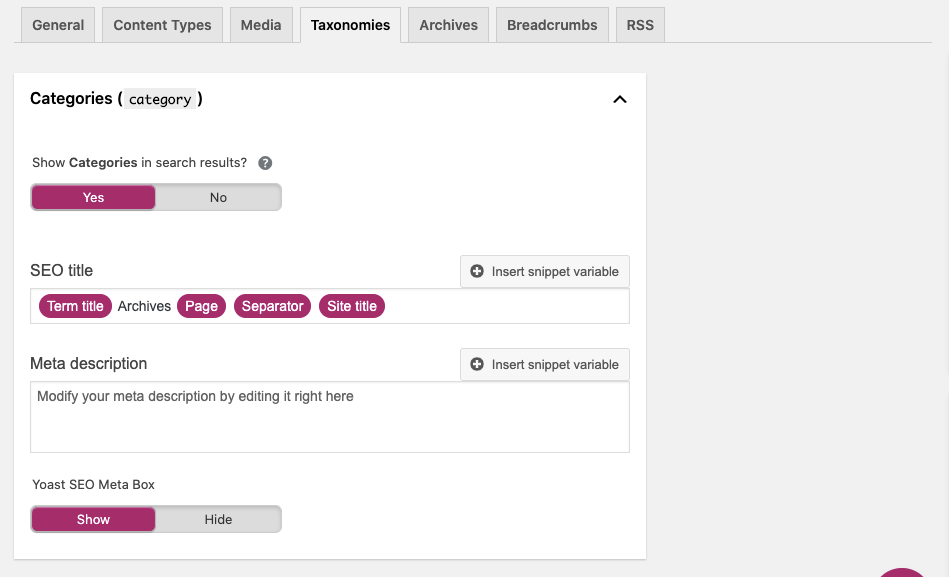
You can go with default template variables as they are suitable for the majority of the websites. And for descriptions, you do not need to worry as we mentioned earlier Yoast SEO takes it from your categories and tags.
Archives
Archive enables you to monitor the search visibility options on the website for various archive pages. It covers author, search, date and 404 pages.
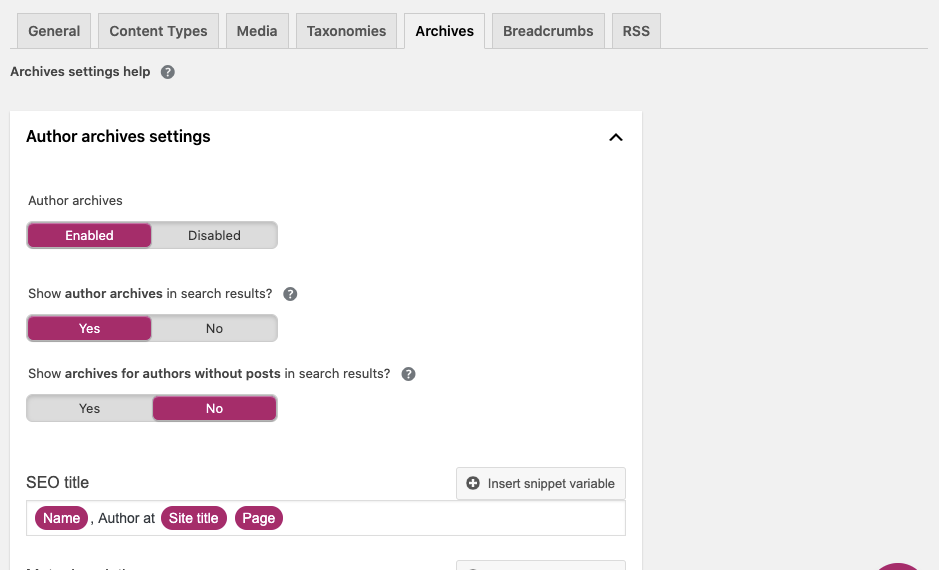
No need to change the default options unless you have a single author blog. For a single-author blog, you can deactivate author archive pages.
Breadcrumbs
Breadcrumbs feature is important for internal linking. It helps search engines to understand the structure of your site. They are also visible search engine results providing added benefits in the search.

Make sure that you click on ‘Enabled’, this will reveal more breadcrumb settings.
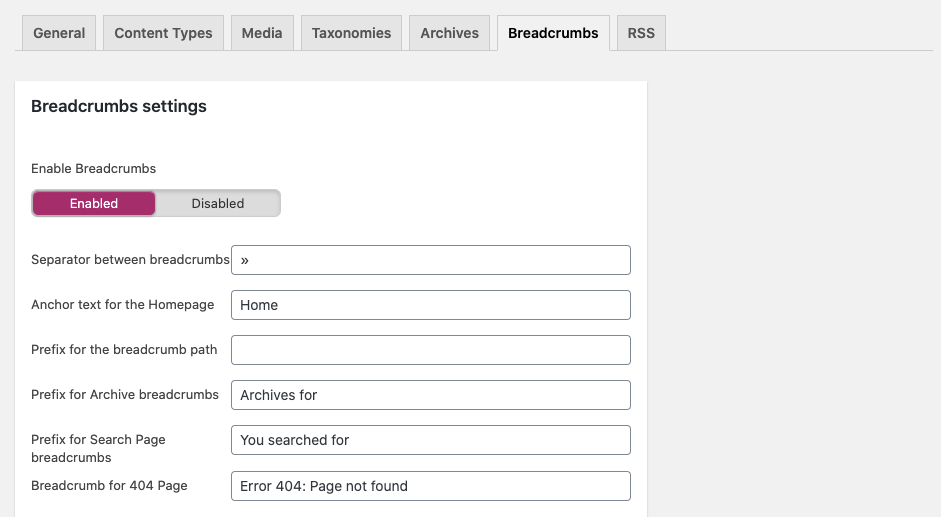
You can leave it with the default setting or else you can do some changes if you wish to and lastly click on the save button.
RSS
RSS Feeds are often used by content scrapers to copy content from your website. Yoast SEO allows you to add a backlink to your own site for each post in your RSS feed.
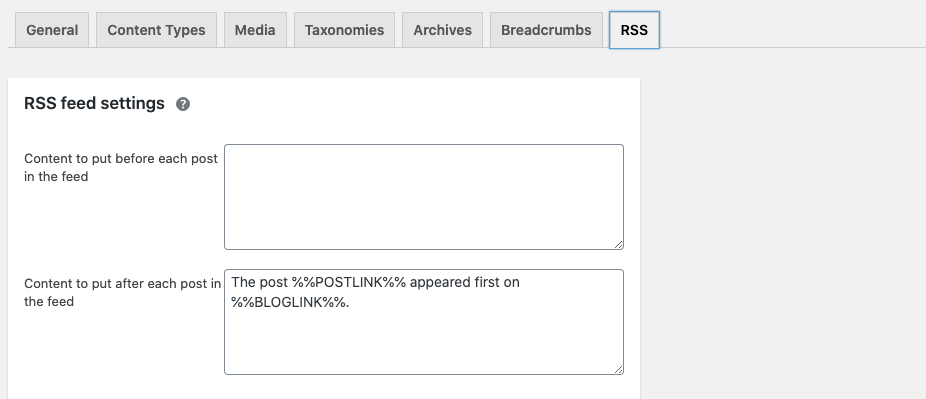
This way, you will get backlinks from their site, and Google will know that you are the original source.
There are options to add your author link, Post link, blog link, and blog description. So get creative. This can also be used to add advertisement to your RSS feed.
Step 6 – Social
Yoast SEO comes with this special feature to link your website with your social media accounts Facebook, Twitter, Pinterest, YouTube etc.
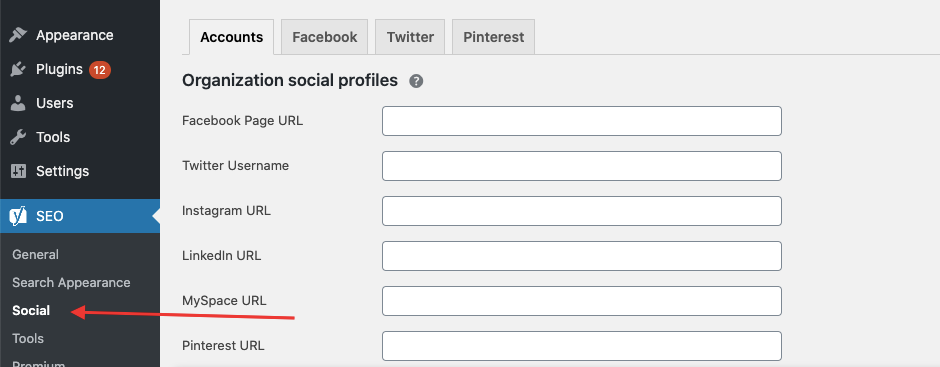
You will find below-mentioned options when you click on Social option under the Yoast SEO menu. Let’s see how to customize each option.
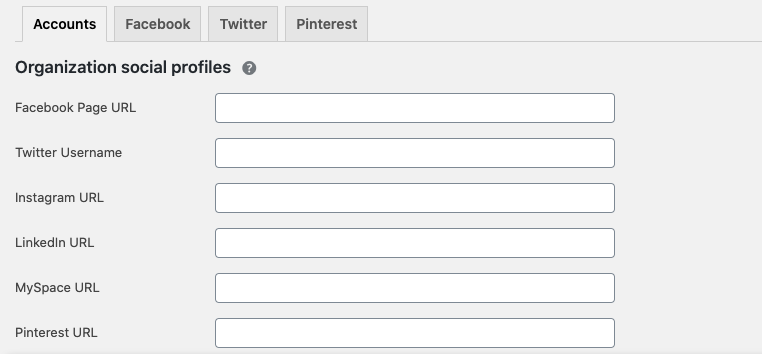
Accounts
Account tab permits Yoast SEO to notify Google regarding your social profiles. This is a very easy step just fill the URLs and Username of the desired social media platform you want to add then click on save changes.
In this tab, just ensure that ‘Add Open Graph metadata’ is set to enable mode. As it permits Yoast SEO to insert Facebook open graph metadata in the <head> sections of your website.
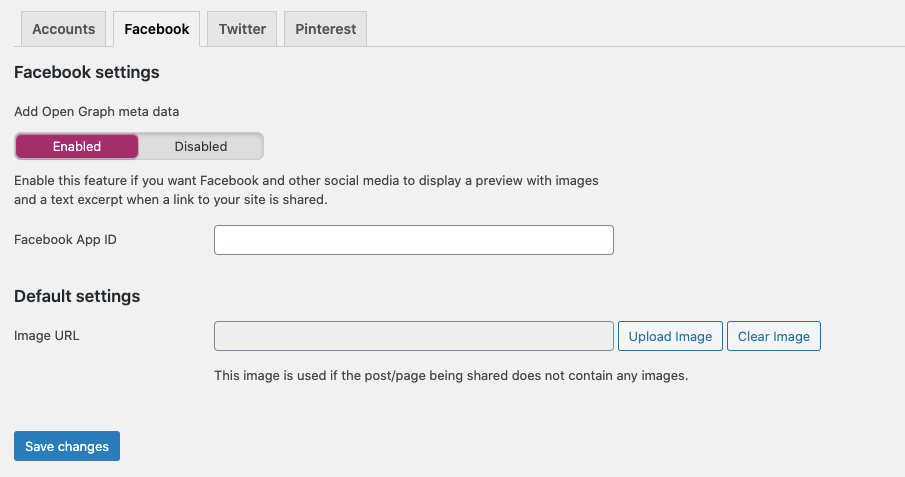
This will guide Facebook to select the correct thumbnail and page detail, every time a post is shared on Facebook from your website.
Then there is a box where you can submit a Facebook App ID, skip if you do not have one.
Scrolling down you see an option to submit a thumbnail with SEO title and description for your homepage. So whenever anyone shares your website’s homepage on Facebook the image and description will appear. Further, you can submit a default thumbnail URL that will be used for articles without any images or thumbnail.
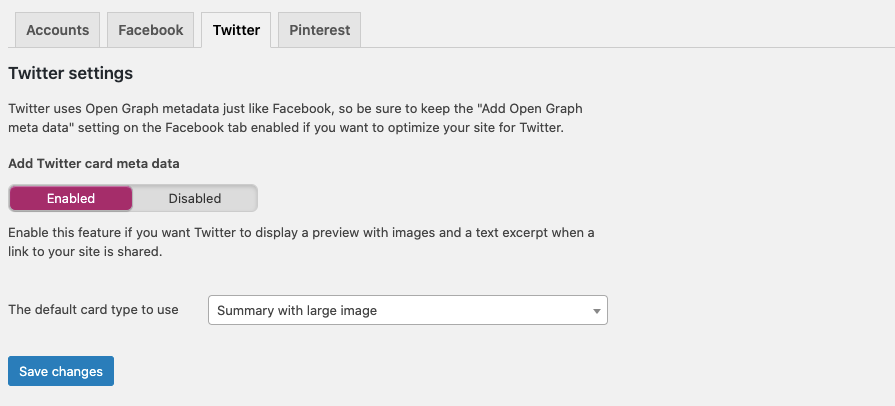
In this section keep ‘Add Twitter card meta data’ enabled. Next, we suggest setting the default card type to ‘summary with large image’.
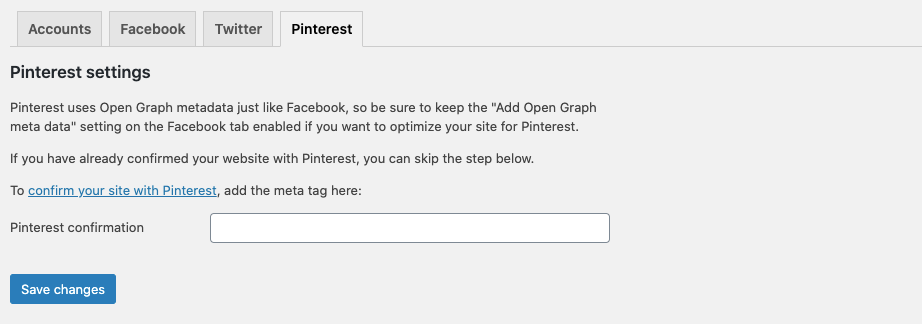
Pinterest will ask you to ‘add the meta tag’ for this you need to go to your Pinterest account settings. Just add your website there and you will get a meta tag which should be submitted under Pinterest confirmation box.
Step 7 – Tools
For advanced function, Yoast SEO provides you with a few integrated resources/tool which can be skipped by beginners. But just for the knowledge, we will let you know about the function of each tool.
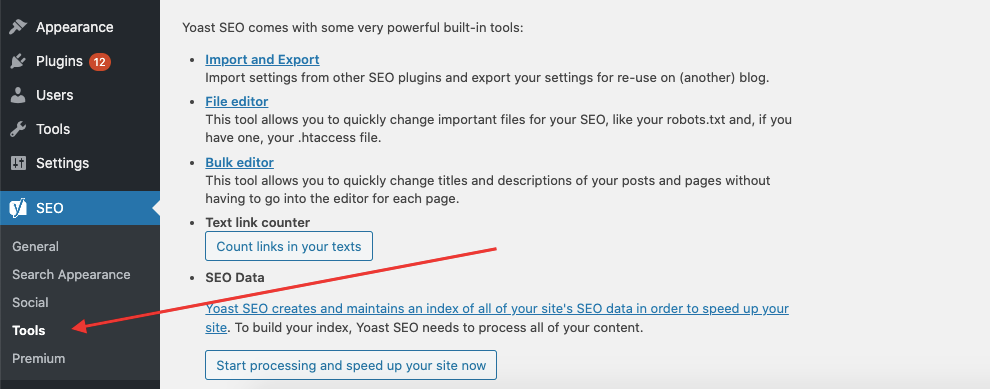
Import and Export
This tool is useful if you want to import SEO data from your old WordPress SEO plugin or SEO function integrated theme. Also, you can import and export Yoast SEO plugin’s settings for using it on other WordPress site.
File Editor
File editor can be used for easy modification of critical files for your SEO, such as your htaccess file or robots.txt file. These configuration files affect your website’s SEO and normally modification required when your WordPress site grows.
Bulk Editor
In Yoast SEO, using the bulk editor you can easily add new SEO title and description for all your articles and pages.
You can add the description by clicking on the description tab. There you will find ‘New Yoast Meta Description’ box for pages and blog post, just fill and click on save changes.
Step 8 – Yoast SEO Premium
Yoast SEO Premium enables you to install redirects quickly to your WordPress site. Also, you will be able to resolve 404 errors instantly.
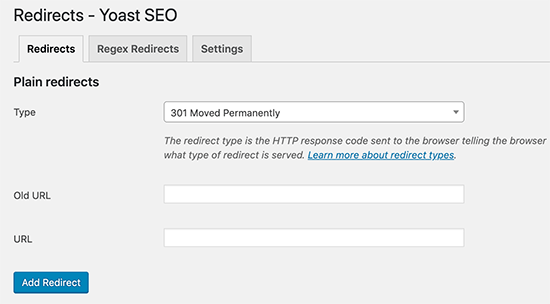
Note: Since redirects have a vital impact on your SEO we suggest not use it with your SEO plugin. Alternatively, to control the redirects, you can use a dedicated redirect like Redirection.
Step 9 – Optimizing Your Posts and Pages with Yoast SEO
So you are done with installing and setting up your Yoast SEO plugin. For making most out of your plugin you have to modify the parameters/settings for individual articles.
We will tell you the process of optimizing every individual post/page in WordPress. You need to click on edit option of the page/post you want to optimize then below the post editor you will see a Yoast SEO meta box.
Click on SEO tab and add your main keyword which ‘focus keyphrase’ or keyword. This is the keyword you are targeting for so that your post will appear in the search result when users will enter that keyword in search engine.
Yoast SEO will analyze your article content based on your focus keywords as well as the number of other parameters. Then it will show you SEO and Readability analysis with suggestions for improvement if required.
You are suggested to write personalized SEO description every time, Sometimes your post title, and your SEO title might not be the same. Every time, you should write a custom SEO description because the auto snippet generator only takes a few lines from the first paragraph. And you do not know that is important or not.
In Yoast SEO, SEO and readability review report are much reliable and tremendously helpful in improving your content. But do not invest your whole time in getting the perfect report.
You should also focus on creating significant content for your user by neglecting some unnecessary suggestions in the report. Do not kill yourself about it, however, or you will spend more time following the analysis rather than creating better content for your users.
Step 10 – Optimizing Taxonomies for SEO (Categories and Tags)
You have the authority to optimize SEO title and meta descriptions for category, tag, and author archive pages. This can be done by visiting your dashboard then Post after that click on categories and you will find the edit option below category. At the bottom of the edit page, you will be able to see the Yoast SEO meta box.
Step 11 – Optimizing Ecommerce Products
In the era of online stores, Yoast SEO also provides you with comprehensive features for eCommerce websites by WooCommerce. You can optimize your product pages similarly as explained above.
We believe this article will assist you to install and setup WordPress SEO plugin by Yoast. If you like this article, then please follow us for more interested and helpful tutorials. You can follow us on Facebook and Twitter.


Trackbacks/Pingbacks